Raspberry Pi Case
Sometimes there is an excuse for doing a 3D project
A few years ago, I began looking at the Raspberry Pi single board computer. It is small and surprisingly capable. I let the effort to understand and use the Pi slide. Life takes funny twists.
But recently, an opportunity to use my Pi came along. We got a weather station with a 5-in-1 sensor package and an indoor display. In the documentation, it says the display can be connected to a computer to collect and share data. The documents describe using a Windows PC program, but it turns out there is a Free Software (open source) weather station software program called weewx which can run on my GNU/Linux computer.
All of a sudden, I'm back pursuing my interest in the Pi.
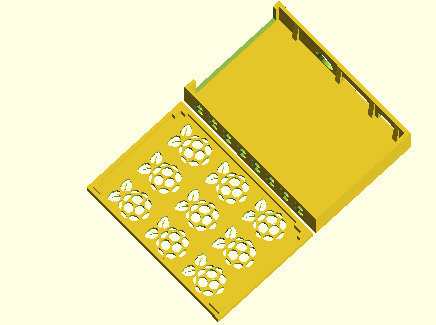
This Pi Case provides a way to access all the basic connections like the power socket, HDMI socket, AV socket along one side and the ethernet and USB sockets at the end. You would need to rework things to add access to the camera connection, display connection and GPIO pins. My current use to run the weewx weather software does not need those things.
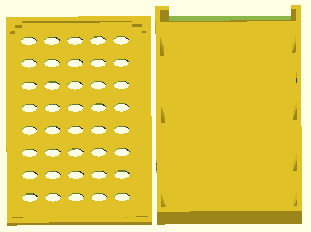
The case fits Pi model 3B+. The microSD card containing the operating system is not accessible without removing the Pi from the case.
There are two versions shared here. rpicase03.scad is a relatively boring version with simple holes cut out of one side and the top to provide cooling air flow. rpicase03b.scad is fancier, having a version of the Raspberry Pi logo cut into the case top.
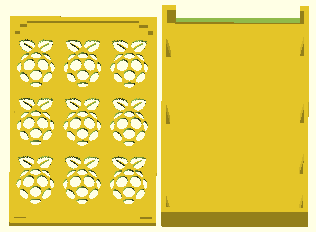
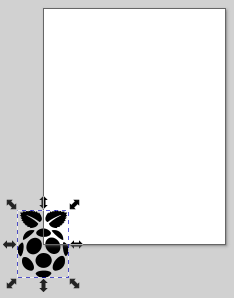
I found a logo version on line at www.pngitem.com created by Kristen Firpo, free for personal use. It has a transparent background. That's important. Without the transparency, most Pi logos don't form effective cutouts. I did not feel artistically competent to re-create the logo in OpenSCAD or in Inkscape all by myself. Maybe some day.
I used Inkscape's "trace bitmap" option from the path menu to make an SVG version of the logo.
It is important to locate the center of the logo in the bottom left corner of the "page". We want the logo's center to be imported into OpenSCAD so it is centered on OpenSCAD's X and Y coordinates so it is easy to position.
Preview of the case is quick. However, rendering the six logos takes a few minutes, in part because of the loop used to position them, but also because the rendering calculations are computationally heavy.
Update: There is generally something that can be done to make a project more flexible. The OpenSCAD files version 03 with just holes in the top and 03b (with the logos) were workable, but, with a little more effort, I was able to combine the versions into a single one: version 3e.
Version 3e has "variables" which allow you to choose:
- Printing just the base or...
- printing just the top or...
- printing both...and...
- being able to choose which top to print!
The code snippet below shows the specifics. Conditional logic added to the code will produce the desired parts.
//=====================//
// Compile-time Constants //
//====================//

// split value determines what parts are done
split=3; // 1: base only - 2: cover only - 3: both
// vents value determines the cover's vent holes
vents=2; // 1: simple holes, else will be logos
}
I think I will leave the earlier versions available so you can compare the changes, if you want.
Available Files:
rpicase03e.scad - rpicase03e.stl - rpicase03e-coveronly.stl - cover with logos (so you can avoid long render)rpicase03b.scad - rpicase03b.stl appx. 3hr to print on Lulzbot Mini
rpicase03.scad - rpicase03.stl appx. 2½hr to print on Lulzbot Mini
rpilogo2.svg - In case you want to experiment with other OpenSCAD case versions of your own.
SCAD files for study/modification and and STL files for quick prints
GPL3 License