3D Central
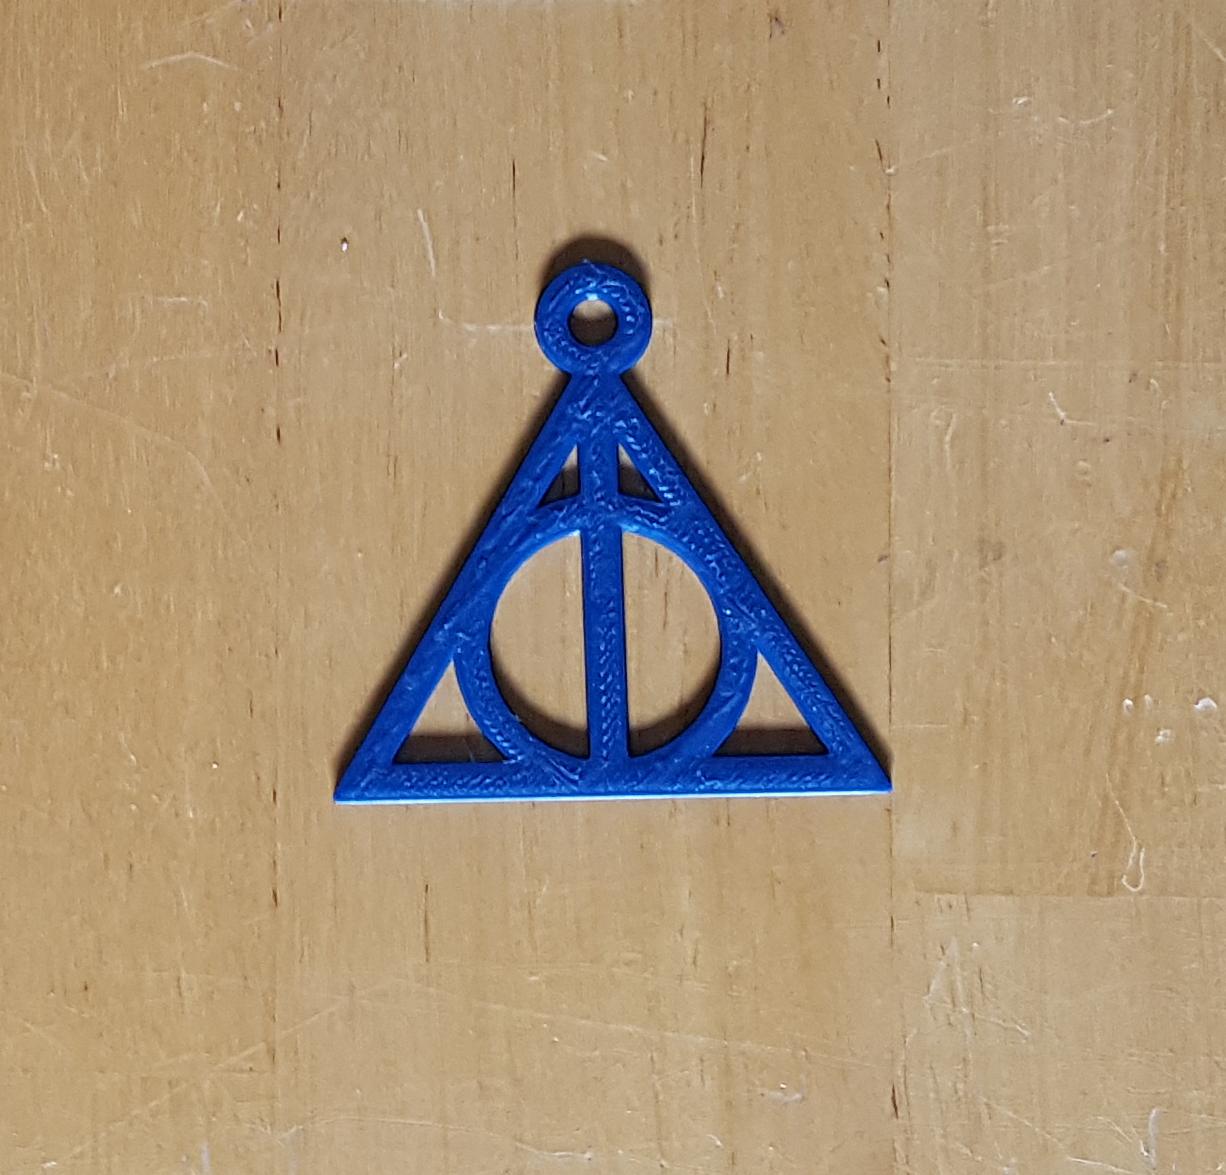
Harry Potter Deathly Hallows Pendant
After seeing a gel casting Instructable, I was inspired to try to make this pendant with my printer. The challenge isn't so much to have the pendant, but to see if I could do a variable-controlled, AKA "parametric" version. Parametric designs are built to be adjusted in size or sometimes in more complicated ways.
I read the first couple of Harry Potter books and have seen parts of several of the movies. My grandchildren liked the books and movies when they were younger. Maybe they will still want one of these pendants to hang on the wall. One can hope!
The main issue to solve in this design is making a good-looking triangle without needing to hard-code the numbers for those three points. A triangle is a polygon. Polygons are any shape with different corner points. A simple triangle is easy to make in OpenSCAD, just pick three points and run OpenSCAD to join them with some thickness.
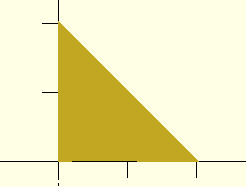
linear_extrude(2)
polygon(points=[[0,0],[0,20],[20,0]],path=[[0,1,2,0]], complexity=10);
A right triangle, like the one above, is famous because it has the Pythagorean Theorem linked with it: "The square of the hypoteneuse is equal to the sum of the squares of the two adjacent sides." The three sides are NOT all equal.
Another random set of points will lay out a triangle closer to what we want.
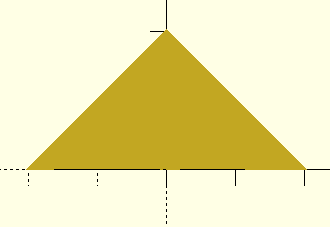
linear_extrude(2)
polygon(points=[[-20,0],[0,20],[20,0]],path=[[0,1,2,0]], complexity=2);
Polygons need complexity specified. The issue is to tell how many sides of the final shape a straight line can go though. Most times in other programs I see, it is set to 10, a safe compromise which will almost always work with no slow-down penalty. In the case of a triangle, the most sides that line can intersect is two. That's why it is set to that value, here.
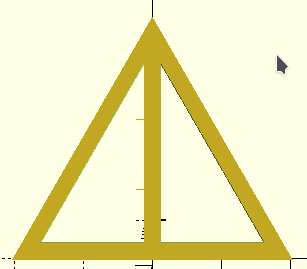
Continuing to make guesses for the numbers will get closer and closer to what we want, but if we want to choose a size and get everything to "just work", we need a formula, just not the Pythagorean one. The internet comes to our rescue. After a few tries, I searched for "equilateral triangle points" and got to https://www.desmos.com/calculator/28kguskkyc which provided a forumula using squares and square roots which I converted into OpenSCAD form. I would love to have the ability to give you a clear explanation of the math, but I regret I am not competent to do that. Maybe you know a math teacher...
...But, after picking a size for the triangle's side, this next line in the code sets the height (Y axis value) from the base of the triangle. I chose to name the variable size. A 60 unit side seemed about right.
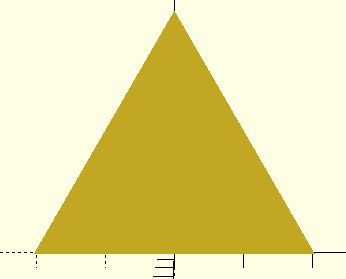
side=60;
ht=sqrt((side*side)-(side/2)*(side/2));
From that calculation, we can print out the main triangle (a polygon with three points) and give it an extruded thickness.
linear_extrude(thk);
polygon(points=[[0,ht],[side/2,0],[-side/2,0]],paths=[[0,1,2,0]], convexity=2);
OpenSCAD units
While there is no actual physical measurement used in OpenSCAD, my printer interprets the exported units in the STL file to be millimeters.
In addition, there are other ways to calculate an equilateral triangle, including finding three equally spaced points on a circle, but I've explored that before, and this method is easier to fit on the x axis.
The next step is to use difference() to create an "empty" triangle before adding the line and circle, all forming the final Ghostly Hallows symbol.

thk=2;
side=40;
ht=sqrt((side*side)-(side/2)*(side/2));
difference(){
linear_extrude(thk)
polygon(points=[[0,ht],[side/2,0],[-side/2,0]],paths=[[0,1,2,0]], convexity=2);

    translate([0,side*.06,-.10])
    scale([.8,.8,1])
    linear_extrude(thk+.2)
    polygon(points=[[0,ht],[side/2,0],[-side/2,0]],paths=[[0,1,2,0]], convexity=2);
}
Next is the middle line with the width controlled by the main size variable.
translate([-side*.03,0,0])
cube([side*.06,ht-side*.1,thk]);
To complete the design, we add the circle, again built using difference().
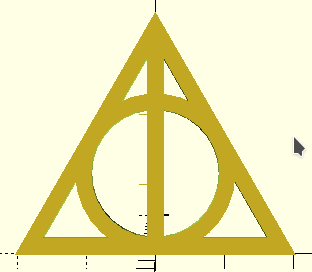
difference(){
translate([0,ht/3,0])
cylinder(thk,ht*.33,ht*.33);

    translate([0,ht/3,-.10])
    scale([.8,.8,1])
cylinder(thk+.2,ht*.33,ht*.33);
}
Add the loop to make a pendant.
difference(){
    translate([0,ht*1.05,0])
    cylinder(thk,side*.1,side*.1);
    translate([0,ht*1.05,-.10])
    cylinder(thk+.2,side*.05,side*.05);
}
Thanks for reading. Whether there is just one of you or dozens, does not matter. I have found that writing these notes clarifies my understanding of the steps involved in the design. While writing, I notice issues in my code and correct them. Telling someone else how something works is the final step in really understanding it yourself.
Happy designing!
Available Files:
SCAD files for study/modification and STL files for quick prints
pendant-deathlyhallows.scad - pendant-deathlyhallows.stl appx. 30 minutes to print on Lulzbot MiniGPL3 License