

Photo Frame Matting
Simple ideas are often worth trying. They may work out great.
On Instructables, I read about a paper project with a cool cutout from a photo with words added to it. I decided to start with a simpler version, making a frame mat.
What follows is the total final code! (minus comments)
difference(){
    translate([-74,-50,0])
    cube([142.5,100,1]);
    translate([-64,-40,-.05])
    cube([122.5,80,1.1]);
}
   linear_extrude(1){ translate([-65,-40.5,0])
text("LOVE", size=20, font="Liberation Sans:style=Bold Italic");}
However, let me take you through some of my earlier thoughts and expose some personal failures and major, though temporary panic. Projects can go through growing pains. This one was like that for me.
This project is intended to fit both on the print deck of my Lulzbot Mini and to also fit an inexpensive photo frame from my local pharmacy. It also meets my wife's preference to eliminate an early idea.
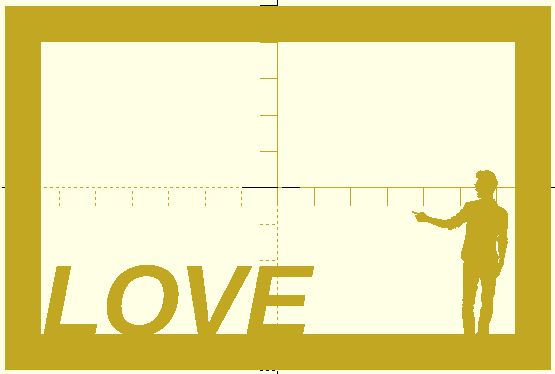
The original idea included a silhouette exported from Inkscape. I have been using Inkscape for years and regularly convert public domain photos into silhouettes in order to illustrate a daily word of the day. You can see examples at http://runelab.org/forum/viewtopic.php?f=4&t=67&start=530. Hobbies are often weird. Don't judge me too harshly.
I trace around the shapes I want in Inkscape. Then I use an extension called "paths2openscad" created by Dan Newman to turn the silhouette path into polygon modules suitable for OpenSCAD. For me, this method makes complex polygons easy. There is no way I could duplicate the outline of this pointing dude on my own within OpenSCAD. Making polygons is a point-by-point process, and when you look at this shape in the "frame1.scad" download file below, you may feel as intimidated as I am by the number of points involved. The extension will need to be put into the appropriate extension folder for Inkscape. When you put it there, the extension appears in the Extensions > Generate from Path menu.
My first version was too thick to fit between the glass and photo, so I made it only 1mm thick, but I was in a rush. My first version was done with the following code. The thing to notice is the cube commands. cube([150,100,2],true); which uses the shorthand for "center=true", and that means the frame-making cubes will center on the axis cross-hairs.
translate([0,0,1]){
difference(){
    cube([150,100,2],true);
    cube([130,80,2.1],true);
}}
   linear_extrude(2){ translate([-65,-40.5,0])
text("LOVE", size=20, font="Liberation Sans:style=Bold Italic");}
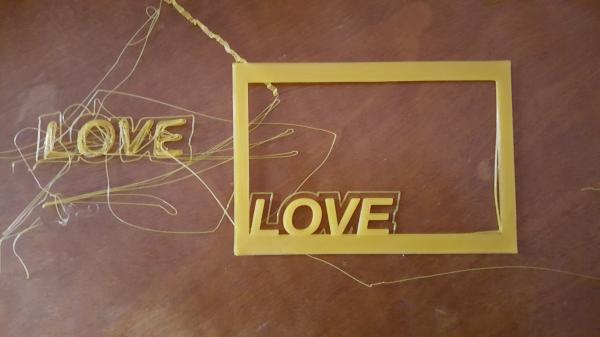
My mistake came when I forgot to properly adjust centering on the axis origins myself. I did fix the X and Y coordinates fine, but I muffed the Z adjustment. I started a couple of prints which went awry, one quite badly. After printing the really terrible version on the left, I was panicking that I had damaged my printer somehow. It is less than four months old! The one on the right looks pretty good, but the frame corners on it lifted off the printer, and when I looked on the back side, I could see what my problem was. The strands of plastic were not totally smooth which should happen. The strands, instead, were each hanging down slightly.
The final, wife approved version of the project, set the frame cube down onto the print bed where it belonged, and the Love Mat slipped into the inexpensive frame, turning it into a very satisfying way to display one of our favorite photos.
Available Files:
frame1.scad - this one's too thick, but it has the standing man's silhouette to examinelove-frame.scad - final, wife-approved, version, a millimeter thick, but without the silhouette
love-frame.stl - for printing, as-is
GPL3 License