3D Central
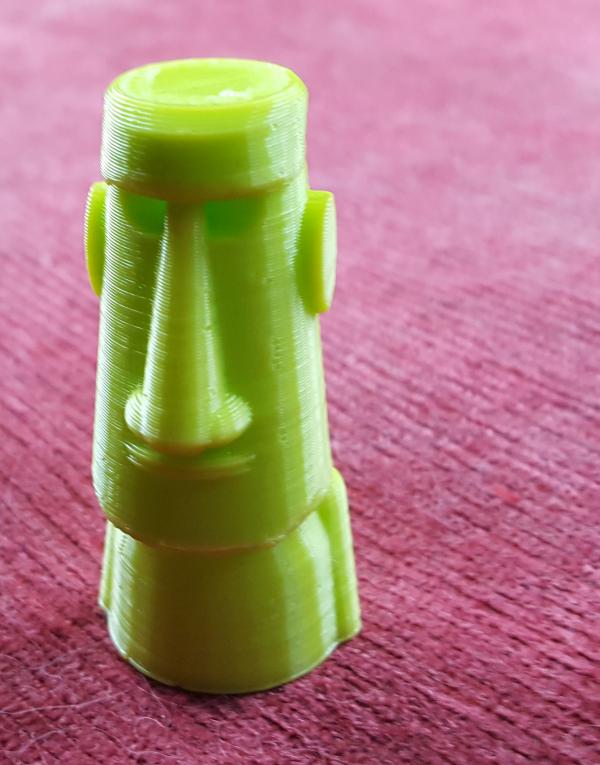
Easter Island Head
When I was printing another project, one which had too much smooth plastic in contact with the PEI print surface of my Lulzbot Mini, I succeeded in cracking the glass print plate of the 3D printer while trying to pry the project off. Small objects come away easily. Thin sheets flex enough to pry a corner up and slide a knife blade under that corner and then gently across under the sheet. The project which caused the crack covered almost a third of the plate surface and was also very thick, over 50mm in the Z axis, apparently too much to pry away without putting excess stress on the glass, cracking it.
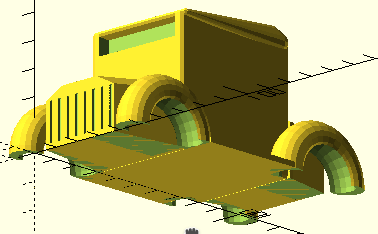
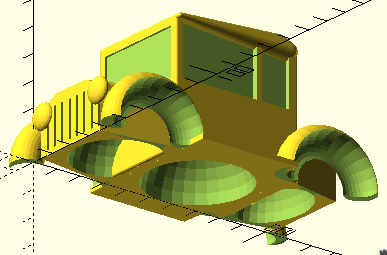
Okay, here's a teaser of the future project page, it's the project which broke the plate when I tried to remove it. All that flat surface was too much, and it's why the figurine has the base hollowed out! I have hollowed out the auto, but have not yet printed it again! Stay tuned.
I was broken-hearted (and broken-plated, of course). Fortunately, it was not as bad as it seemed. Lulzbot has the part I needed in stock and ready for online order and there are clear instructions online. After I ordered the new heat bed kit, Lulzbot shipped it out to me quickly, so I was only delayed a few days. During those days, I continued to think about projects I might do and let the fickle nature of the Internet be my guide. I happened upon a photo of the Easter Island (Rapa Nui) figures known as "Moai" and decided to try creating a version. Of course, I made sure to remove significant amounts of surface contact of the figurine's base. I don't want to be a pro at replacing my print plate over and over.
Once the kit arrived, the whole repair, including reading the instructions, took less than an hour.
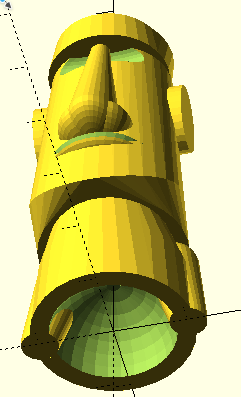
Making the base hollow to reduce the chance of another broken plate was a final step, in in the project It is a minor, though important, "optimization". Getting all the other design elements in place comes first, and usually, I begin version00 with a set of hard-coded numbers for the various part sizes. This time, I actually pushed myself to do design with the variable assignments right off the bat. I want to push my skills forward whenever possible.
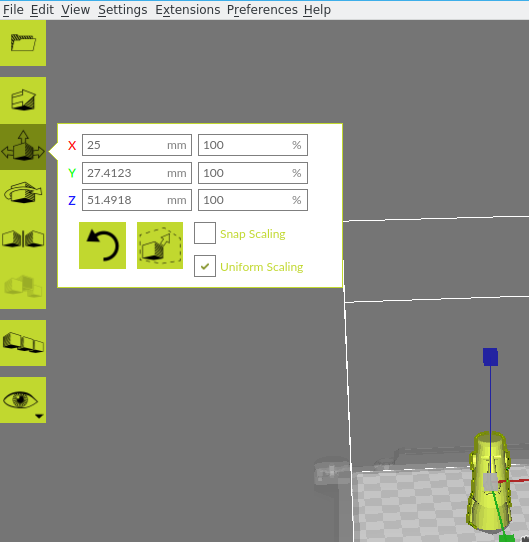
I decided to try to tie all the other measurements to the height of the figurine. All other part measurements would then be fractions or multiples of the height. I decided my test case size should be 50mm tall. Everything in this design is controlled by the single variable assignment ht=50;.
In this case, that meant quickly abandoning a specified width of 22mm for the base of the body's cylinder. Instead, I assigned that width as a percentage of the total height of the final figurine. Ultimately, every element in this design changes proportionally when I make a taller or shorter version. That means the radius of the cylinder base should be set as a decimal "percentage" of the height cylinder(ht*.2,ht*.22,ht*.2);. Those values make a slightly tapered torso. The part sizes were not always "right" with the first value, but, instead of changing 20mm to 22mm, it was ht*.2 changing to ht*.22, still a trial-and-error process during initial development, but eventually making size adjustments easier.
Now, I do realize that this effort to scale every part from the height can be overkill. The net effect is the same as just letting the slicer software handle scaling, something my slicer, Cura, does well. Ordinarily, changing the height (Z) from 50 to 100 would also double the width (X) and depth (Y) equally.
How did I do my "overkill"?
For each trial number value, I tested each value by dividing it by 50, the height, to get a decimal "percentage" value. I used an on-screen calculator, but any calculator will do, even good old scratchpad and pencil.
20 divided by 50 = 0.4 (or 40% of the height). Also, 22/50=0.44
If the test value is larger than 50, that works out just fine, too. 60/50=1.2. The part would be 1.2 times the height.
Please understand that ALL values need to be tied together if this is going to work. I overlooked the code for the mouth which divided the mouth (a squashed sphere) into two lips. The original polygon was hard coded and worked fine for the 50mm figurine. When I printed the 100mm version, the mouth was one combined lip, not two. The hard-coded numbers didn't adjust. Duh! That's why I'm delivering you version03 instead of version00. "The best laid plans..." With each version, 01 and 02, I added small "improvements" to the design. If you want version00, just email the address in the web page's footer.
ht=50;  // needed if you want to clip and test this code on its own.
// mouth
difference(){
translate([0,-ht*.17,ht*.47])
scale([1.3,1,.35])
sphere(ht*.1);
    scale([1.55,1.4,1])
translate([0,-ht*.107,ht*.47]){
rotate_extrude(convexity=10)
translate([ht*.1,0,0])
//circle(r=1);
    // version02b revised lip split
rotate([0,0,270])
    //////////////////////////////////////////////////////////////////////////////////////////////////////
    // polygon(points=[[-1,-.50],[1,-.50],[0,-1]],paths=[[0,1,2,0]]); // hardcoded version which needed correcting
    //////////////////////////////////////////////////////////////////////////////////////////////////////
    polygon(points=[[-ht*.02,-ht*.01],[ht*.02,-ht*.01],[0,-ht*.02]],paths=[[0,1,2,0]]);
    }}
Note:
OpenSCAD does not really have variables like those in programming languages. The OpenSCAD "variables" are more accurately described as "constants". Once the value is set, it stays the same for the entire run of the code. length=10; is a valid command, but length=length*2; does not work. Once "length" is assigned an initial value, it cannot be programmaticaly changed. That does NOT keep us from making a part be a percentage of the fixed value. It would be perfectly fine to say width=length*0.5; as a statement in our OpenSCAD directions. the length is not being changed/reassigned. Another value is getting its assignment FROM the original, fixed length value.
Available Files:
SCAD files for study/modification and STL files for quick prints
easterisland03.scad - easterisland03.stlGPL3 License