Stenciling and Silhouettes with Inkscape
Step One Pick an image which you would like to remix.
Get it from a source which allows remixing. Most work published on the Internet is NOT suitable because it has "all rights reserved" copyright protection. Of course, if you take the original photo yourself, then you have all the rights. Any work published automatically has copyright applied. No registration of the work is required. It is not technically necessary to specify your rights, though you would typically do so by entering the phrase "Copyright 2015 Algot Runeman", substituting your own name.
While retaining copyright, some people may publish their work with a liberal license like one from the Creative Commons. Those licenses modify the "all rights" level and grant to everyone else, one of several levels of freedom to reuse and remix. For example, I generally use the Attribution license (cc-by) which asks only that a person who uses my work state in their publication that I'm the author of the stuff they have remixed.
Please learn about Creative Commons licensing and consider using the most liberal one you can to encourage students and other creative people to share your work and expand its chance to be seen.
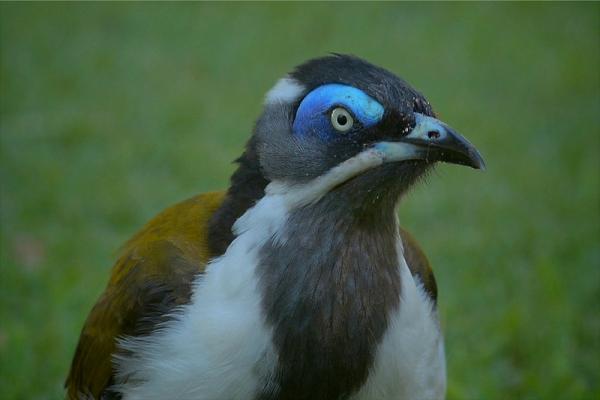
Blue-faced honeyeater photo by David and Dorothy Jenkins [cc-by-nc-sa]
I chose this image of a bird because of the clean color separations. Shading of color is not really part of the stenciling process. Clean results come from using a few colors in the process. The image is part of a portfolio published by David and Dorothy Jenkins on the Flickr site. Flickr has an advanced search page which makes it easy to limit your search to work licensed with a Creative Commons license. David and Dorothy's choice of license does not require that I ask them for permission to reuse the photo. I must respect the limits of the license they chose, but the normal conversation with them for copyright clearance is not required for this article's remix of their work. The creative process is enhanced by the license instead of being delayed or perhaps, totally blocked.
Start Inkscape
(Inkscape is Free Software available from http://inkscape.org. If you are using Ubuntu or another GNU/Linux distribution, the package should be available in your Software Center or other package management utility.
If you are totally new to using Inkscape, there are many great tutorials on the Internet, or you could refer to the Inkscape Basics Handout from a NatickFOSS meeting in September of 2011.
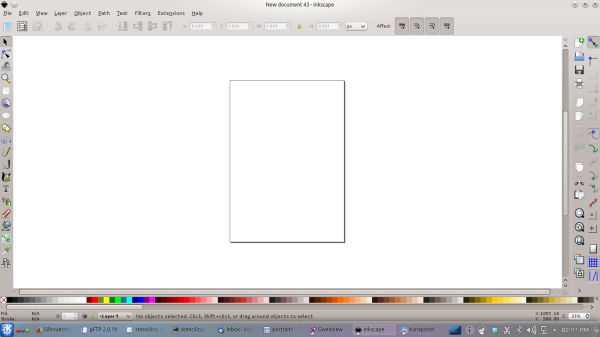
With a blank, new Inkscape screen open, use the import option of the File menu. Navigate to the location of the image and embed the graphic into your Inkscape document.
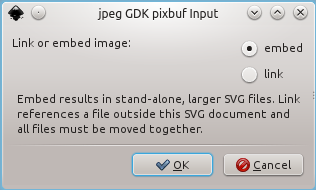
Embedding makes your Inkscape file portable. You can share it and not need to send along the separate picture of the bird.
Layers
The basic plan is to create shapes by outlining the color patches. You can do this directly onto the imported image using the bezier/line tool, but using Layers make color separation easier.
Choose Layers, the bottom choice from the Layers menu and, in the dialog, click "Layer 1" to edit it if you want, making the name "Photo."
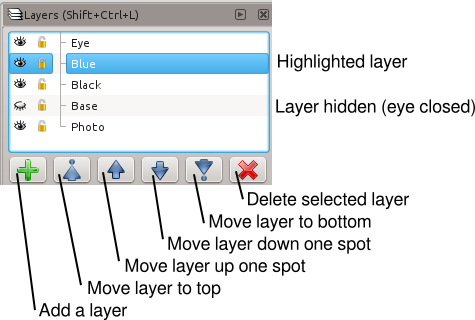
Add a layer by clicking the plus symbol in the dialog box. Name the new layer "Base." Click to activate that layer so it is highlighted.
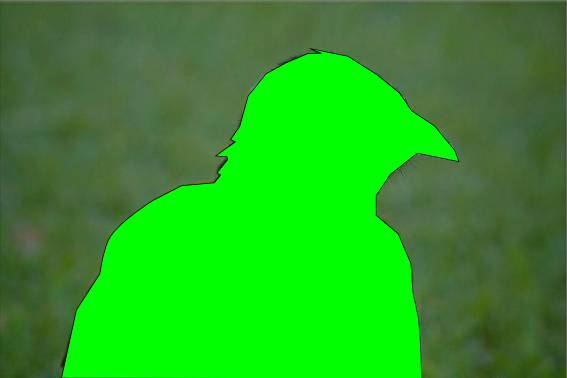
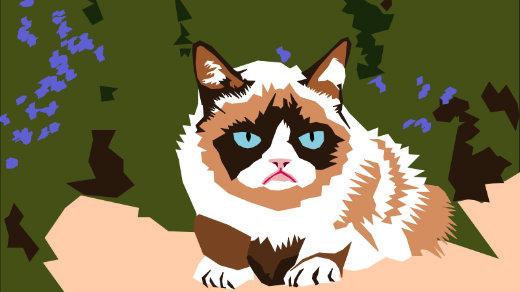
Now using the bezier/line tool  , click along the outline of the bird to make a shape. Don't rush, but don't worry if you are not exact. You can adjust later. Fill with green since that is the color of the bird's back. (I do realize that the green I've chosen is NOT the same color as the bird's feathers. You might be able to do better). Stenciling is more a broad-stroke sort of color process.)
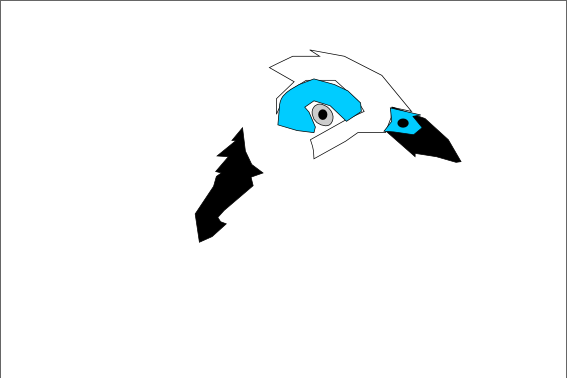
Choose either a color or a feature (or eventually some of each) and create a layer again, naming it appropriately.. Do a bezier line around each feature or color. Ordinarily, while working at this stage you DO want an outline of black. Later, in the cleanup phase, you can remove outlines. In the following image, I'm doing black outlines and have two patches filled, but one still in its outline shape. The photo and base layers are turned off to help you see the outline.
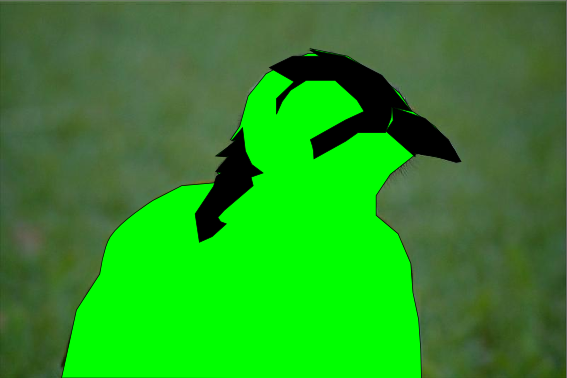
Don't be too picky, but do plan a bit. It will be easier to get the look you want. You may find that it is easier to work from the back to the front and large patches to small. If you go out of order, you can shuffle the layers as needed.
To be able to see the "higher" layers, click the eyeball for the lower layers so only the current one and the photo are visible. After adding a layer of color or physical feature, turn the other layers back on to see how you are doing.
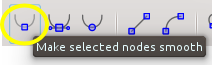
Once you have added an outlined shape, you can tweak it by using the path/node editing tool  . Select the tool, then click the edge of the part you want to adjust and drag nodes around bit by bit. If a node is making too sharp a bend, try selecting the node and applying the smooth node tool. You can also wait until later. All the shapes of any layer are editable any time in the process.
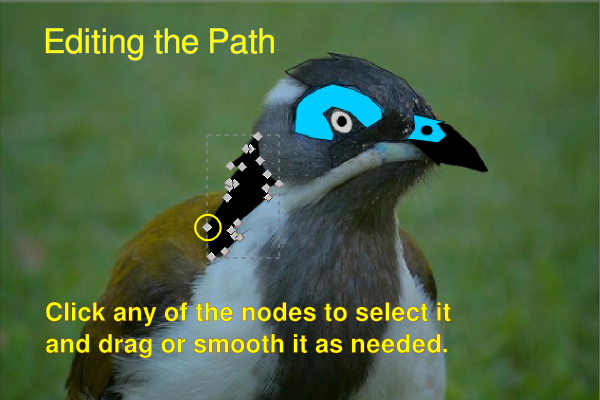
To adjust the shapes, you may wish to turn on visibility of just the photo layer and one other at the same time. It is up to you. Do what seems logical.
After adjusting the shapes by dragging or smoothing nodes in each layer, work on a background layer. I've decided I want to focus on the bird, so I just did a rectangle to cover the original photo and shuffled it down to be just above the photo layer itself. If there were leaves or some other focus points that would improve the remix, certainly add them.
I also used the Document Properties option of the File menu to set the size to the same dimensions as the photo.
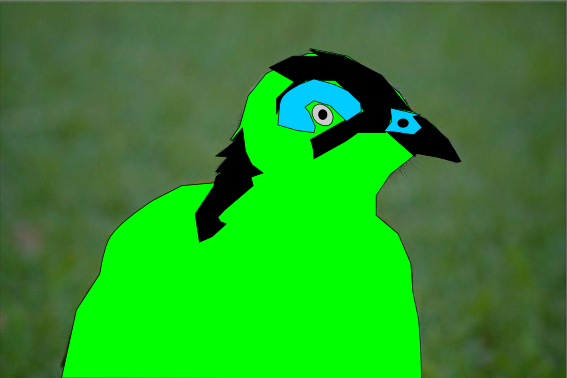
 Almost done...just some final tweaks needed.
Silhouettes
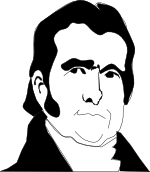
Doing an all-black-filled outline results in a nice silhouette. If you can make the size small for final use, the flaws of your outlining technique will effectively disappear. Some of the following examples were outlined in overlapping sections to make the work easier. These examples are from my clipart pages.


Another silhouette technique does not fill in the entire outline. Some components are done as bezier lines. There's a separate tutorial page for this technique, too.
Sources
Blue-faced Honeyeater Portrait David and Dorothy Jenkins - birdsaspoetry via flickr [cc-by-nc-sa] The license means this image is for non-commercial use. It should not be republished for profit. It also needs to be labeled so others will see the limits of remixing and re-shared with the same license. This article, as a whole is more liberal, but the original bird image would need to be removed if someone wanted to republish my work (a remix). That's not practical, so this article needs to share the restrictions of the original bird image. You cannot change the rules in midstream. Choose wisely. License carefully.
Inkscape stores its work in a vector graphic file format with the SVG extension. Vectors are shapes defined by outlines making the final images very easy to export to any desired size. "Paint" programs like The GIMP or Photoshop work with pixel graphics and trying to enlarge an image can create jagged borders (pixelation).
Inkscape Stages: 25% Done - 75% Done - 100% Done
You will need Inkscape installed to be able to open these files. (Right click link to save to your own computer or "Save Page As.." from your browser after a left click of the link to any of the SVG files.) SVG files will display in modern browsers.
Kimberly Keyes Tutorial another recommended tutorial (Thanks, Dick and Jill Miller)
Copyright 2015 Algot Runeman, licensed for reuse with the Creative Commons Attribution-NonCommercial-ShareAlike license. Feel free to use, remix and repurpose this information. All I ask is that you acknowledge the authors and the source shown below when you reuse it. You must also limit yourself to the same license [cc-by-nc-sa] because of images incorporated from other authors.