")
Image Credit: John McCullough, licensed CC-NC-ND
This section of the guide is an appendix, in part because it covers material that is NOT introductory. That does not mean you can't do the steps, but you might feel more comfortable going through the process with a friend who is computer savvy. As always, a local FOSS user group like NatickFOSS will have friendly people to help you.
This page is also related to a presentation at the October 3, 2013 NatickFOSS meeting. I welcome complaints and suggestions for improvement of not only this web page, but any other part of the intro guide. EMAIL
It is a good idea to try Linux as a "Live" distribution for a while before you commit to an installation. A live distribution will boot your computer into a fully functional Linux system in a temporary way. The operating system and programs all load entirely into random access memory (RAM). No changes are made to your long term storage, the hard drive. Like any contents of RAM, the live Linux completely disappears when you shut down the computer. Nothing is left behind.
Your easiest route is to use a CD or DVD with a live image on it. Ask at NatickFOSS and we can make you a copy. Give us a bit of warning, though. We don't usually carry disks around, but will happily give you a copy at the next meeting after your request.
Image Credit: John McCullough, licensed CC-NC-ND
Bookstores like Barnes and Noble also sell copies of magazines which come with DVDs full of Live Linux distributions. Linux Format is one such magazine from the UK (sadly not cheap).

Most computers are set up to start by first checking the optical drive (CD, DVD) and then the hard drive which is the normal place you have a bootable operating system. That means a Live Linux optical disk will quickly set up the image in RAM so you can explore. There are many versions of linux which have a live image. This section of the guide will talk about using Ubuntu from Cannonical, but Fedora from Red Hat, openSUSE or any other live image works fine. None of them change your hard drive in any way unless you choose to install them there after you have explored the live image for a while.
However, you don't need to wait if you are bold. You can prepare your own CD/DVD (to be covered in a different section of the guide).
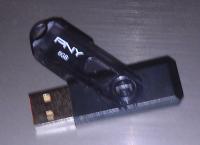
You may also put the live image on a smaller, easy-to-carry USB drive stick. If you set up the portable USB drive properly, you can carry it with you and use it (with permission) on the computers available wherever you are. You can boot into the kind of Free Software you know and love.
This section of the guide will begin as the least complicated steps for setting up a USB stick. Expanded, more technical information may follow. Remember that the purpose of this guide is keeping it basic as much as possible.
We who love Linux, hope you will eventually want to go further, changing your hard disk drive so it is either totally devoted to Linux or setting up to dual boot so you can continue to use your current operating system (Windows?) part time, and use Linux too.
This section of the intro guide is being published earlier than usual. It will start a bit rough. With your feedback, it will improve. It is here early as a reference, linked to the October 3, 2013 meeting of NatickFOSS. I made a presentation about how to use a program called Unetbootin with Windows to create a bootable USB stick drive.
With a live distro on CD or USB, you can evaluate Ubuntu (or any other version of GNU/Linux which is available as a "Live Distro." Live distributions will boot into only the random access memory (RAM), making no changes to your current Windows or Macintosh operating system. Nothing gets changed on your hard disk drive.
The first step is to get the files you need. One is the program to make a bootable USB drive. It is called Unetbootin, a neat program found best by searching for the home page. Be careful. The order of the search isn't always going to show the actual home page at the top of the search list.
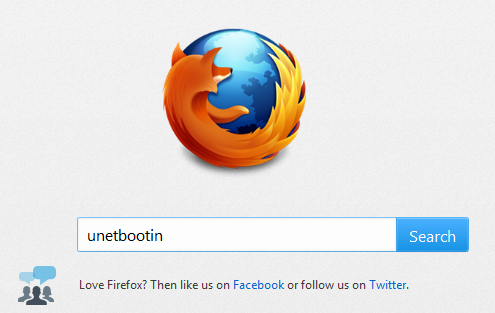
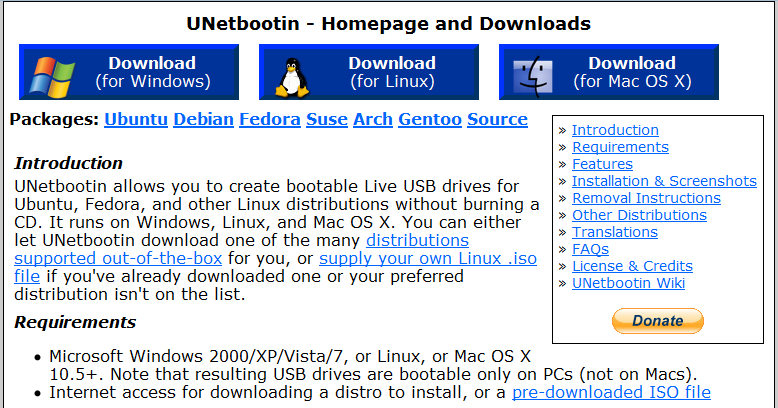
The best place to get it is unetbootin.sourceforge.net
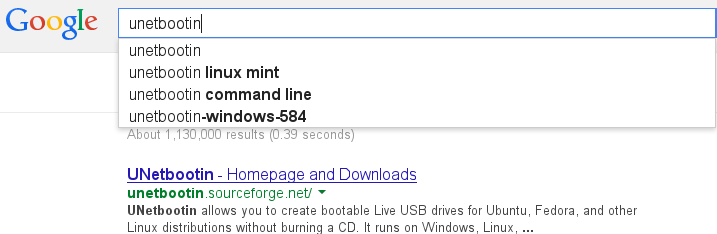
My search using Google on Kubuntu Linux gave the home page first, but the search on Windows used "Ask" search and the home page was way down the list.
Once you get to the site, choose the appropriate version. As you can see, you can run Unetbootin on either Windows or Macintosh, so you can start from your current OS.
In addition to Unetbootin, you need the version of Linux you want to put on the USB drive. In some cases, you might want to use the built-in feature of Unetbootin to do the network download within Unetbootin istelf, but it might be easier to have the image (iso) file already. It isn't particularly fast when you download a whole operating system image and you are better off if you do the downloading with a computer hooked to the network with a network cable instead of trying to do the OS download with wireless. Wireless is MUCH slower.
Getting Ubuntu is easy if you have a fast Internet connection. It is still easy, but will take longer if your connection is slow.
The demo assumes you are using Windows. Once you finish the downloads, you can run the Unetbootin program.
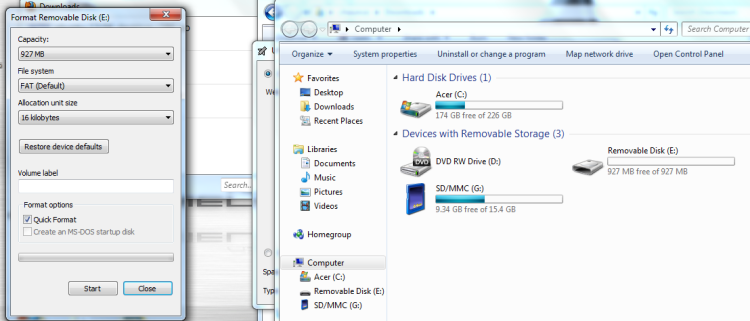
But before you do, put a USB drive stick into any available USB port on your computer. Make sure you carefully identify the letter which Windows assigns to the drive, and, if necessary, reformat the drive. It is best to use an empty USB drive, maybe even a new one. Be very sure that any files on the USB have copies elsewhere. The basic Unetbootin steps don't preserve what's already on the USB stick. A 2 gigibyte (2GB) USB drive is fine, but in 2013 it might be difficult to find a USB stick smaller than four or even eight gigabytes. (Advanced persistence features word better with more space.)
Unetbootin is a self-contained executable (exe) program. It doesn't need to be installed to the programs list from the start menu on Windows. You can run it from the location where you saved it (in my case the "downloads" folder). The Unetbootin is often carried around on a USB drive and run from there by the tech crowd.
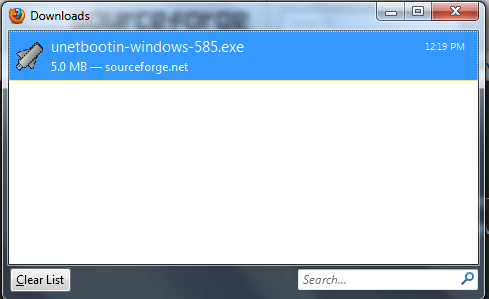
Unless you have your Windows system set up differently, the Downloads folder is where you will find both the Unetbootin program file.
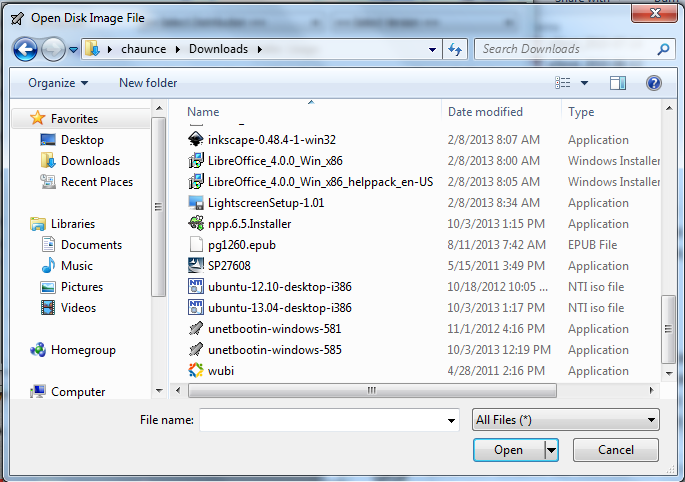
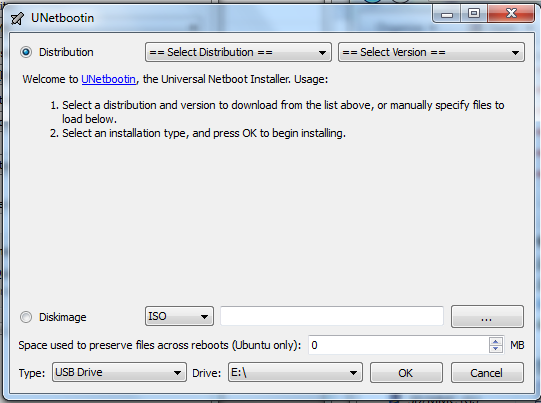
The Unetbootin program starts with the assumption you are going to do a "Distribution" network download, so you will need to change to the "Diskimage" option. Diskimage is what Unetbootin calls the iso file you downloaded earlier. Click the ellipsis button to go looking for the iso image.

It is going to take a while for some files to transfer to the USB drive, depending on the computer you have. One specific file is VERY large. The progress bar stalls...around 5% for me. Wait patiently. It will eventually move along.
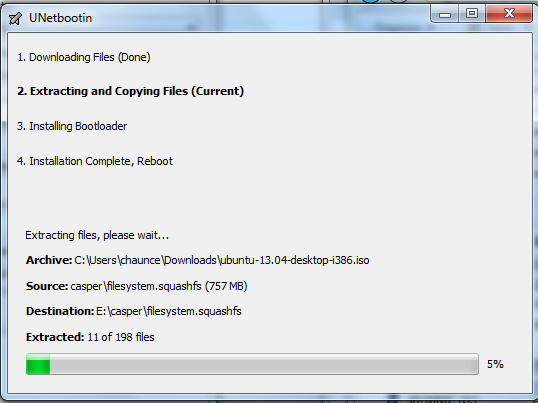
The work done by Unetbootin is very automatic. Aside from the typical delay, the four steps finish up without more work from you.
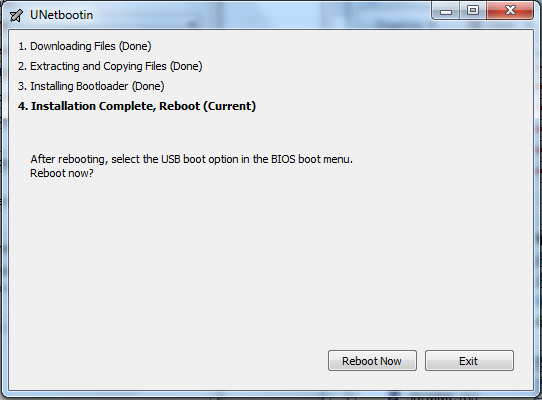
The USB is now set up to be a bootable disk. For now, choose Exit and remember to properly eject the USB drive. [[example image needed here?]] You can drop it in your pocket and use it on any computer where you have permission, not just your own. Always ask. Before purchasing my current laptop, I tested several models in the local computer store with the tech staff's permission. It helped that the head technician was a Linux user!
Most computers are not set up to be able to boot from a USB drive. You will need to override the normal boot order to get your live Linux USB to work.
Cautionary Note:
The issue of boot order makes this guide a step up from the normal "for beginners" purpose. It may not be obvious to a non-techie person, how changing boot order happens. Some computer manufacturers don't even show the boot order message on screen by default. It may require more trickery.
Sometimes you can get to a boot order option by making the computer think you have a stuck key, so immediately holding down the ESC key might get you there.
For only a VERY few seconds when I start my computer I see a message at the bottom of the screen which says my boot order selection key is F12. I see something very much like the next image which appears right after I start it.
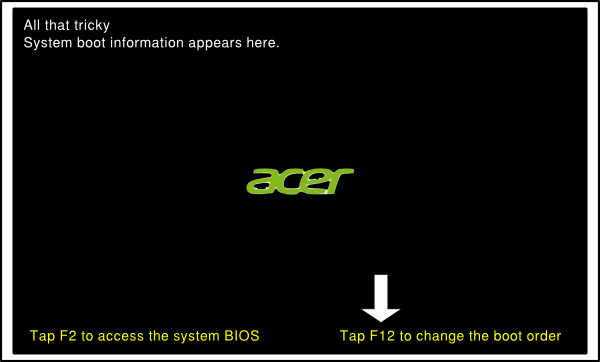
Your computer may tell you some other key (F8?) is for boot order selection. The manufacturers of computers have NOT agreed on a standard, too bad.
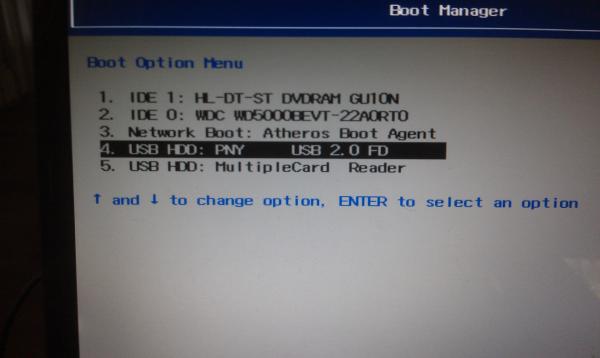
Most computers are designed to boot the operating system from some sort of long term storage. Typically the sequence is:
In the image below, you can see my system's normal boot order. The USB which now contains the Linux live image is #4.
When you do boot from the USB, a menu offers something like the following image.
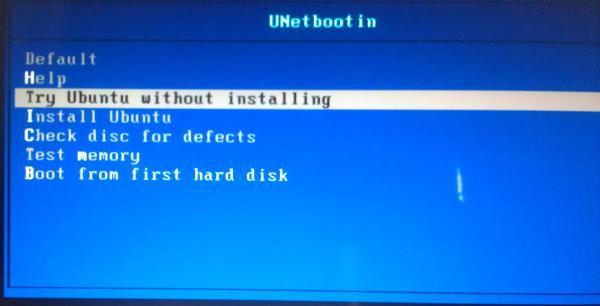
Default is to "Try Ubuntu without Installing", but I have used my arrow key to move down the menu. Tapping the Enter key while "Default" or "Try Ubuntu without Installing" is how you start the boot. Double check that you have NOT chosen the install option.
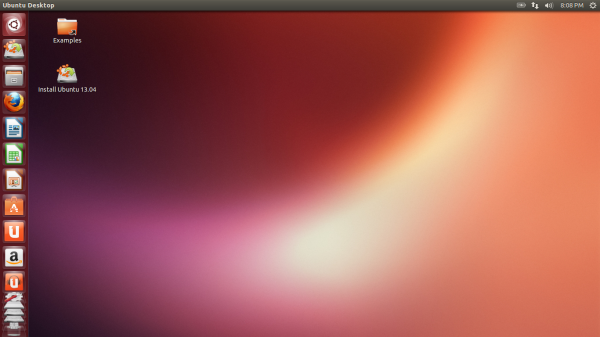
What you will see is going to look similar to the next image. This is Ubuntu's "Live" Desktop. Unity and any programs you try will be transferred from the USB (or CD/DVD if that's where you booted from) into RAM. Everything is going to run somewhat slower than it would after a regular install, but you will be able to test out almost every feature of Ubuntu using the live desktop. Have fun.
Particularly note the icon which offers you the chance to install Ubuntu...Maybe your next step!
© 2013 Algot Runeman email: algot@runeman.org - Shared using the Creative Commons Attribution license.
Source to cite: - filedate: