Installing Ubuntu
Ubuntu is the favored GNU/Linux distribution of the NatickFOSS group.
We're planning to do an install fest in November. Ubuntu is recommended
for users new to GNU/Linux because it is designed to work "out of the
box" for most basic situations. The people who will participate as helpers for the
install fest will know Ubuntu best and will have more skills with it
than with other distributions. However, it may also be possible for
visitors to the install fest to request other options.
This document is intended to help illustrate the steps that happen
during a direct install of the Ubuntu on a computer hard drive.
It is intended to help you follow the process during a demonstration at the October meeting of NatickFOSS.
For those who attend the meeting, please use this document to follow
the actual demonstration of an install. As we prepare for the install
fest, we also want a version of this to be a visual guide for those who will bring in their
computers to have GNU/Linux installed. (printed?)
The age and speed of the computer will determine the length of the
install. This document shows the most advanced version of Ubuntu
available as of October 2012. It is designed to run best on a
relatively recent computer. If a person comes to the install fest with
an older computer model, it may be wise to counsel them about using a
lighter weight install. Ubuntu has plenty of features which will be
inappropriate for an old computer. As a simple guideline, if the
computer was purchased with Windows 7 originally installed, we're good
to go. If the computer ran with Windows XP, it will do OK. Anything
older will do better with an install of Xubuntu or Puppy Linux.
(The extra steps involved in sharing the drive with Windows (also called Dual Boot)
will follow. The computer which I have available to do the demo does
not have Windows on it. For the record, these directions were actually
done in a virtual computer to make it easier to capture the screen
images. The demo will use a real computer, though, to make the demo
like the actual install fest event.)
Step 1
Open your CD drive and insert a CD/DVD of Ubuntu. This release of
Ubuntu no longer fits on a standard CD. Older versions and some other
distributions still do.
Alternatively you may use a live image on a USB drive. This document
does not cover the details of making a DVD image or USB install image.
Step 2
Start your computer and if it does not start from the CD drive or USB
stick, you'll need to tap the key which allows you to choose the boot
drive.
On my computer the key is the F12 function key. Unfortunately each
computer manufacturer decides which key will activate the boot menu.
You might find F2 gives you a choice of various options.
Sometimes holding down the escape key during the startup will offer options on the screen.
Step 3
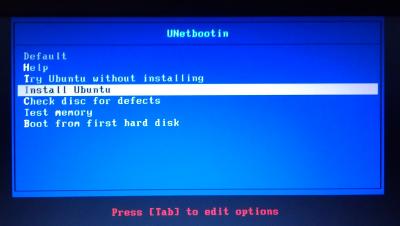
Once the DVD or USB of Ubuntu has become active, you will see a screen similar to one of these.
The first image is the menu from an ISO image (CD/DVD). The second is
the menu of the USB image created by the utility called UNetbootin (not
a Ubuntu product).
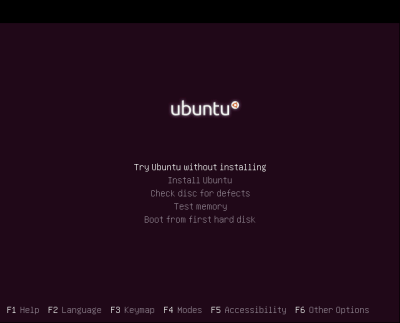
For our example, in this demo, we have already decided to take the big jump to
GNU/Linux. We will go through the process of an install, but clearly
the first option will let a person begin more slowly by using Ubuntu
without ANY changes. If you decide as I have, use the down arrow on the
keyboard to move down and highlight the "Install Ubuntu" choice. (By
the way, if you don't decide rather quickly, the highlighted choice
will activate after a short delay.)
Step 4 (covers through the end of the elements of the "install")
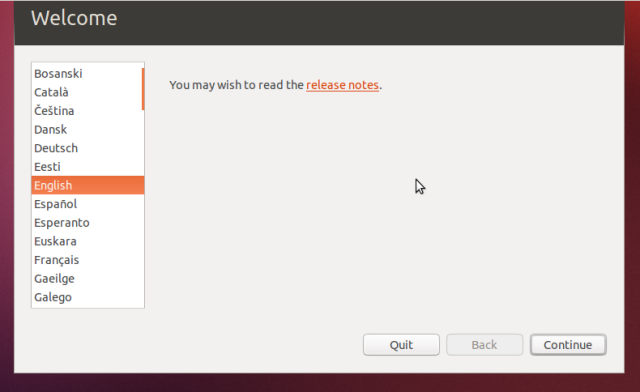
Next, you'll choose the language that will be used for the install. (I
read English best, so that's the one I chose. Clearly the Ubuntu team
has consideration for those who don't have English as their native
language. Whatever language you choose, you will click the button with
the word "Continue" on it. I'll generally just say, "Click Continue"
when I mean this kind of thing. The install is designed to be done with
a mouse in hand, though you can also use keyboard taps to move forward.
In this case, tapping the Enter key will activate the Continue button
(You should note that the button has a little heavier outline which
indicates it is the selected option which Enter will activate.)
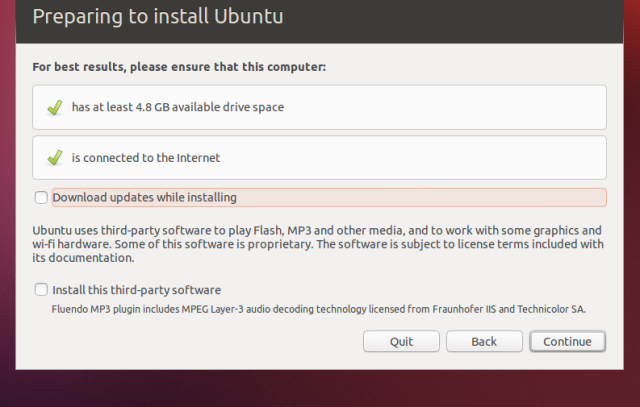
Ubuntu's installation moves on, and as you will see in the next
illustration, Ubuntu evaluates some of its own recommendations. The
check marks indicate that the computer I used for the illustrations had
enough drive space and was connected to the Internet. You do have to
decide whether to download updates DURING the time we are installing.
There WILL be updates. You might save time doing the install and update
together, but updates can take half an hour and should only be done
while connected to a broadband connection (wired). Significant updates
(like the ones I encountered) don't work well on WiFi, especially while
several people are connected at the same time.
You also need to decide if you want "Third Party" software. In general, say yes to
make your computer do all the things you expect. Flash, MP3 and similar
software are not desirable for the purists who avoid proprietary code.
We are assuming that the majority of the people who come to an install
fest will not come in as GNU/Linux experts. Those experts are very
welcome, though. Step up and help.
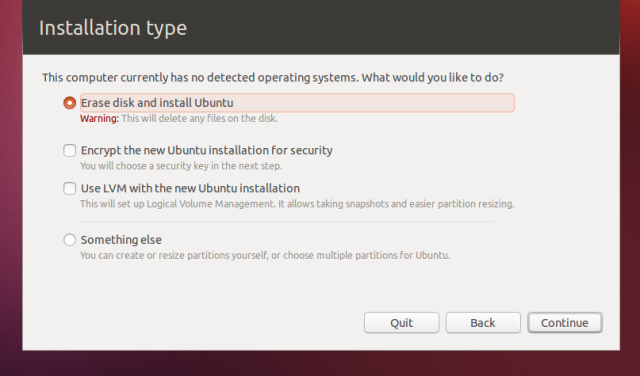
The next illustration has some more advanced options which I'm going to
gloss over. I've already decided that I'm wiping my computer to put
Ubuntu on it. I decided not to encrypt the drive. I'll use a password
later for login. Encryption is good for "road warriors" who might lose
their company computer while on a business trip. If that's your
situation, check with your boss.
Now, be aware, when you click the Continue button on the next screen,
the install begins. If you want to chicken out, click the Quit button
now before changes are made to your drive.
Most of you will have brought in a computer with a current operating
system (Windows XP, Windows 7, etc.) You will then see a screen similar
to the next image. The Ubuntu installer recognizes the structure of
your current disk.
The details will vary. The computer in the illustration below has two operating systems sharing the hard drive (AKA dual boot).
I chose to do the second choice "Erase Ubuntu 11.10 and reinstall"
because the version was old, and not core Ubuntu (Kubuntu - my normal
personal choice).
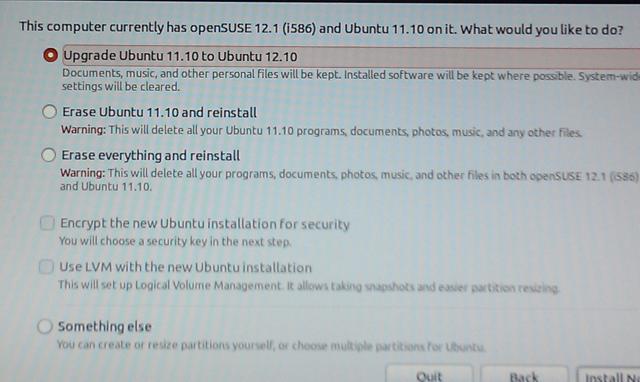 Photo of screen...not screen capture.
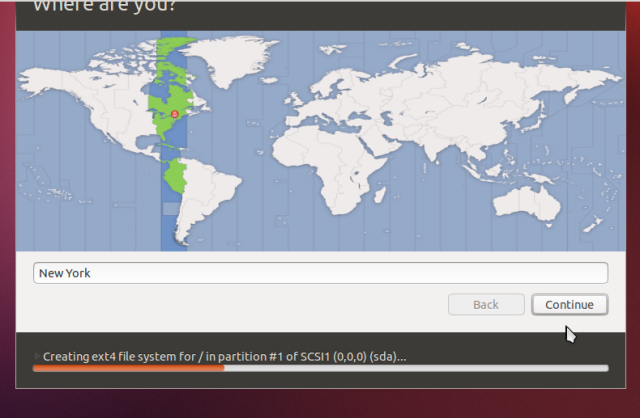
As you can see in the next illustration, your disk is being formatted
for the install. Formatting creates the magnetic structure for the
drive to store the bits of software efficiently. For the record, the
format is NOT the disk format of Microsoft Windows nor of Apple OSX.
Called EXT4, the disk format is the currently most popular and a very
efficient one for GNU/Linux.
You are going to answer a few questions while the installer works in
the background. Here you are picking your time zone. For your computer
clock to make sense, choose a major city in your time zone. For us in
MetroWest Boston, the signature city is New York even though the Red
Sox and Yankee fans don't see eye to eye, in spite of sharing the same
time zone.
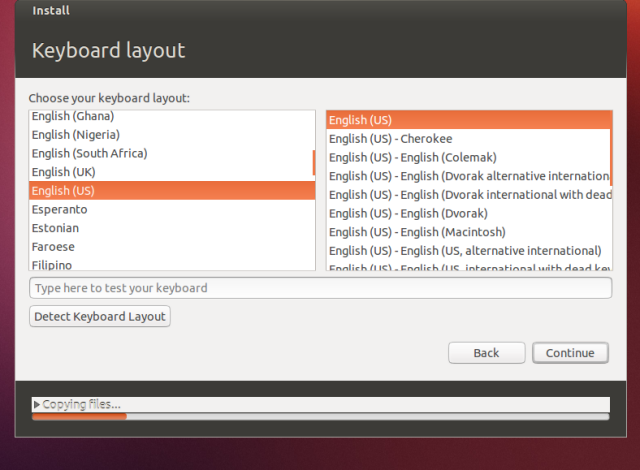
Unless you know otherwise, the US English keyboard is your best choice.
(Again, notice that the progress notice at the bottom show files are transferring to the hard drive.)
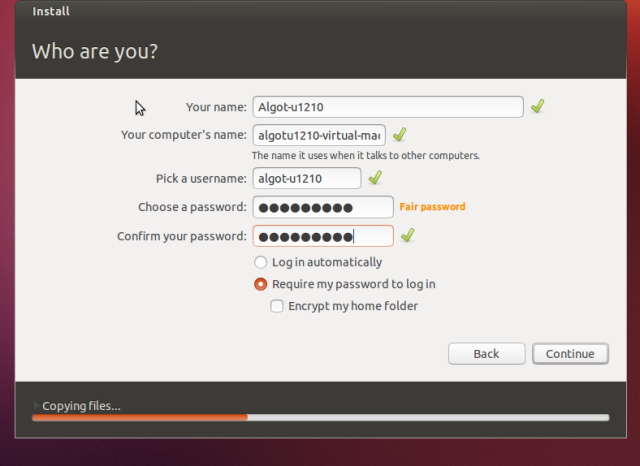
Take WRITTEN notes as you go through this next step. Especially be sure
you KNOW the password you use. You need a password even if you decide
to bypass using a password when you routinely log in (automatically).
The account you are creating is the master administrative user. To do
system updates you will need to use this password. Checkmarks show your
choices are adequate. You can see that the password I picked isn't
considered strong enough.
Good passwords are:
- easy to remember
- hard to guess
- hard to build from words in a dictionary
- longer than you probably want to remember
- include odd characters
Be careful. Don't use your pet's name or your birthday or phone number.
(If you are one of the volunteers helping at the install fest, make the
"client" feel more comfortable by turning your head away while the
person types the password the two times. That action reinforces the
security of a good, private password.)
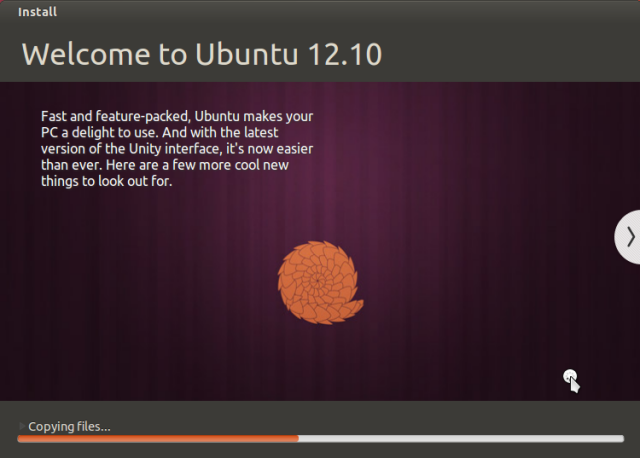
While the files continue to transfer from the CD/DVD/thumb drive to the
hard drive, Ubuntu's installer software presents you with a short
slideshow tour of things to come with your new setup. You get a hint
about the new features and the default set of installed software. It is
really worth noting that the software which the Ubuntu distribution
chooses for your default set is useful. It is not bloatware.
There are no "demo" versions. The base distribution is all value packed
software. In addition, of course, you may choose to add software
through the package management system which is called the "Software
Center."
Continue to be patient. The age and features of your computer determine
the length of the overall installation. Older, slower computers will
take longer. The more RAM (memory), too, the faster things will go.
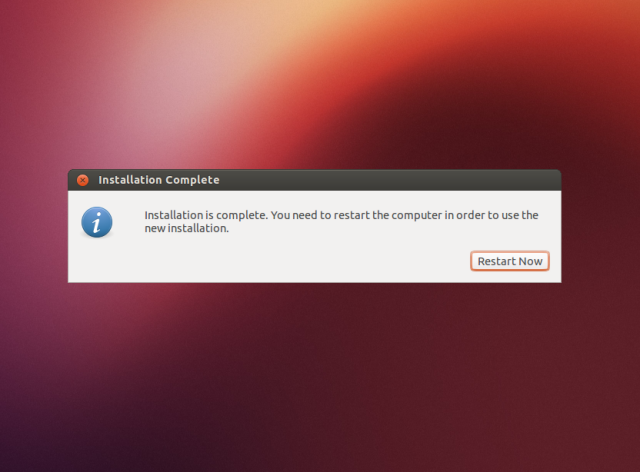
We have reached the end of phase one. There are a few more steps, but
the software that has been copied over from the CD/DVD/thumb drive. In
most cases, a restart will work smoothly right after you click the
button. If things stall, don't worry.
- If the delay includes some odd screens and the computer "hangs"
for three minutes or so, hold the main computer power button to shut
down.
- Then wait for a count of ten (computer components need to "drain" their residual electricity).
- Start the computer again (also called a cold boot).
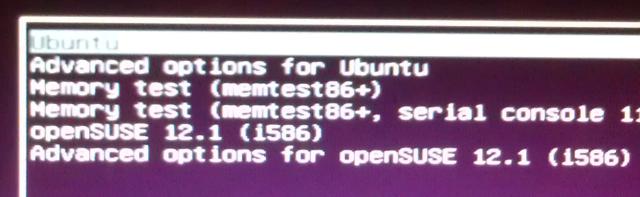
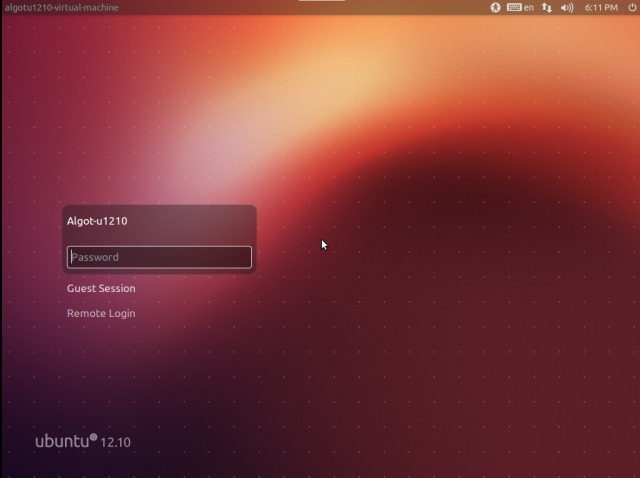
As the computer restarts, a screen showing information about the
available "boot" options will appear. The following illustration shows
the computer with a dual boot of Ubuntu (the system we just installed)
and another GNU/Linux system called openSUSE. Using the arrow keys to
move up and down the list lets you select the options. Generally, you
will only need the Memory test if you are having some serious system
troubles.
The top option is the default, and after a few seconds (typically ten) the default system will start.
Rearranging the startup options isn't a basic user task.
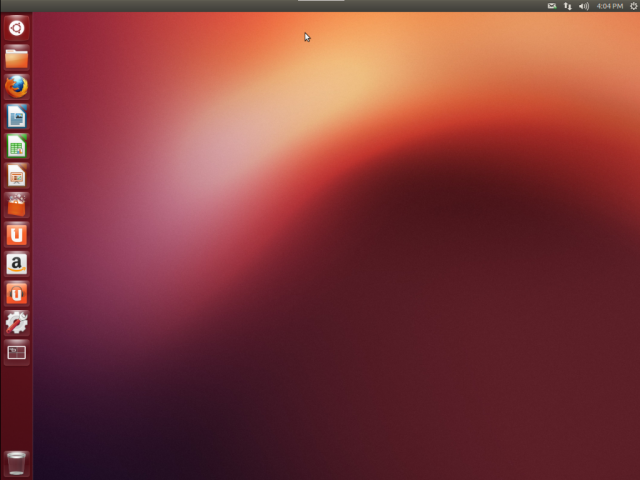
The computer is now a GNU/Linux computer. It is running Ubuntu 12.10.
(In my case, the second beta because the official release happens in
late October and this demo is scheduled for the 11th. By the time of
the install fest, we'll be able to offer the official version. We may
also want to recommend that some users will prefer the stability and
longer maintainance cycle of Ubuntu 12.04 which is called "Long Term
Support" version because it is maintained for five years. The interim
kind of version like 12.10 is only supported with official updates for18 months.
Step6
Although the install is done, there is a really big chance that there are a few questions that remain in the "client's" mind.
It is appropriate to lead the person through a quick guide to the interface.
(Maybe we can offer the link to the first pages of the Senior Center Ubuntu Guide or sell paper copies at cost.)
Even with that guide, you'll help the person who is new to Ubuntu by showing a few basic activities.
If we have the luxury of a wired connection, you could also offer the
chance to do the first updates. That's actually going to be one of the
most technical issues a new user is going to face. It will ease them in
if you can show how it is done (especially since it isn't done at
shutdown the way Windows updates are done.)
Try not to make too many technical details part of your help. Judge the
response you give by the kind of questions you get asked. Be as basic
in your answers as you think the person needs. Add more if necessary or
if you get technical questions.
(During the demo, let's decide what a minimum intro should be.)
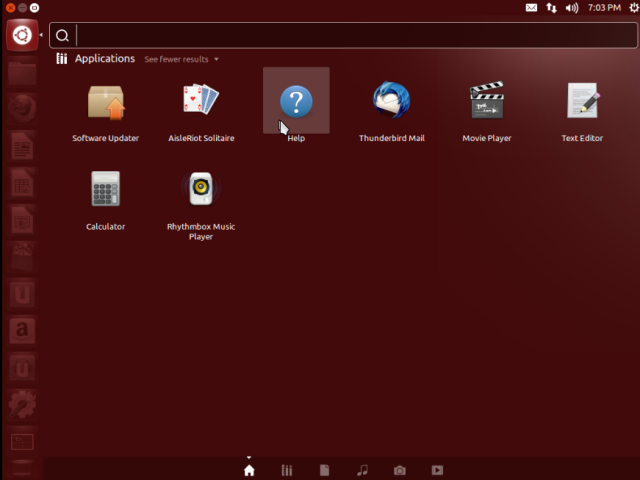
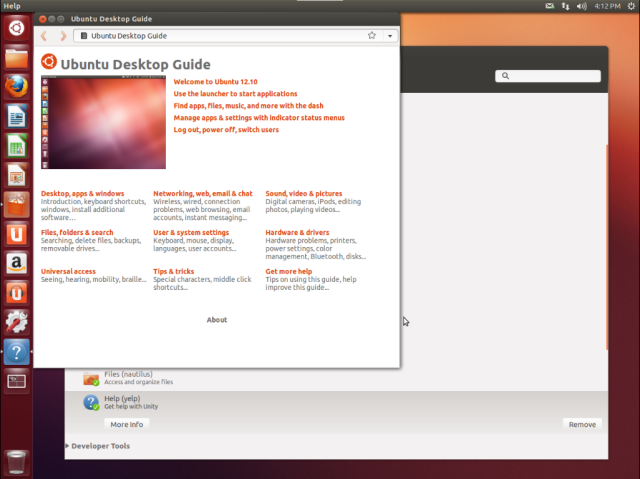
If a person is in a rush, make sure that you show them the built-in
Yelp help system. For some, that will be a safe place to start. The
online forum discussions are also a great source of information, but do
not provide direct answers. Reading through the discussion often
involves some very technical stuff with command line recommendations.
It may safely be presumed that most of the people at the install fest
will not be geared toward that. If we can draw them in so that they
plan to come to the NatickFOSS meetings, they can find out more of the
insider's perspective.
Show a person a way to get started. Don't tell them too much to bury them in details they will NOT remember when they get home.
Step 7
I'd be inclined to show them Firefox (especially if they are a user of
Internet Explorer user). Browsing the Internet is a skill that seems
central to the use of computers by most people these days.
Step 8
Show how to shut down. Have the person restart the computer and get
into a program, perhaps Firefox or maybe the LibreOffice word
processor. We want them to feel comfortable with their "new" computer.
Step 9
Officially invite every visitor to the install fest to keep in touch.
Let them know about NatickFOSS. Give them a brochure/card/?? for the
Web site.
If we have official Ubuntu CDs, we can pass them out. If a person wants
us to burn a CD/DVD, we can do so for cost. (Unless we get a blank
media donation.)
If they have a thumb drive, we can offer to give them an install tool
for their family/friends/neighbors. As the Ubuntu Massachusetts team
likes to say, "Learn to Teach, Teach to Learn."
Step 10
Shake hands, smile one last time and watch as the person heads home.
Look around for somebody else to help. Won't it be nice if we are busy?
(Depending on your style, maybe you can do a group install with two or
three computers.)